Suppose your client has a requirement to show a different set of visuals with a “Button Click”. What will you do? How do you add the Wow factor?
This is where “Bookmark” comes into the picture. It is an amazing feature in PowerBI which can be used to show different sets of visuals without creating multiple sheets. This feature also helps improve the customer experience while navigating through your Power BI report.
Bookmark combined with Button feature can help create Custom Buttons.
Step 1: Make sure “Bookmarks Pane” & “Selection Pane” are selected under the View Option. This will open “Selection” & “Bookmarks” pane on the right side of the screen.

Step 2: Now to create a new Bookmark you can click on “Add” button. Once clicked, “Bookmark 1” gets added. Similarly, we will add another “Bookmark 2” and assign only one visual to it.

Step 3: To assign one visual to “Bookmark2”, we will hide one visual let say “UnitPrice by Region” under “Selection Pane” and then Click on ellipses (…) and click on “Update”. To rename a Bookmark, either “Double Click” on the bookmark or you can use the (…) to rename it.

Step 4: To view all the bookmarks in action, you can click on “View” button adjacent to “Add” button under Bookmarks pane. This will open a ribbon at the bottom of the report.

Assigning a bookmark to a “Button”:
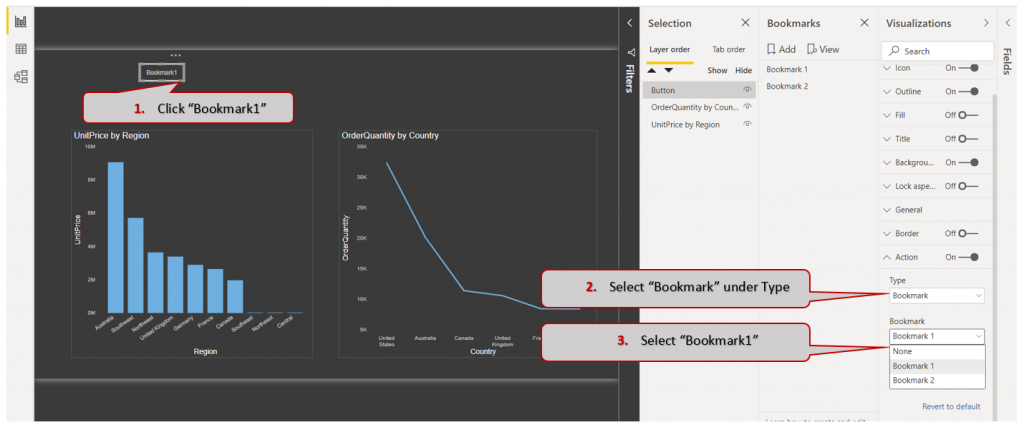
Step 1: Create a “Blank Button” and rename it as “Bookmark1”.

Step 2: Click on the “Button”, this will open “Visualizations” tab on the right side. Select “Type” as “Bookmark” and “Bookmark” as “Bookmark1”

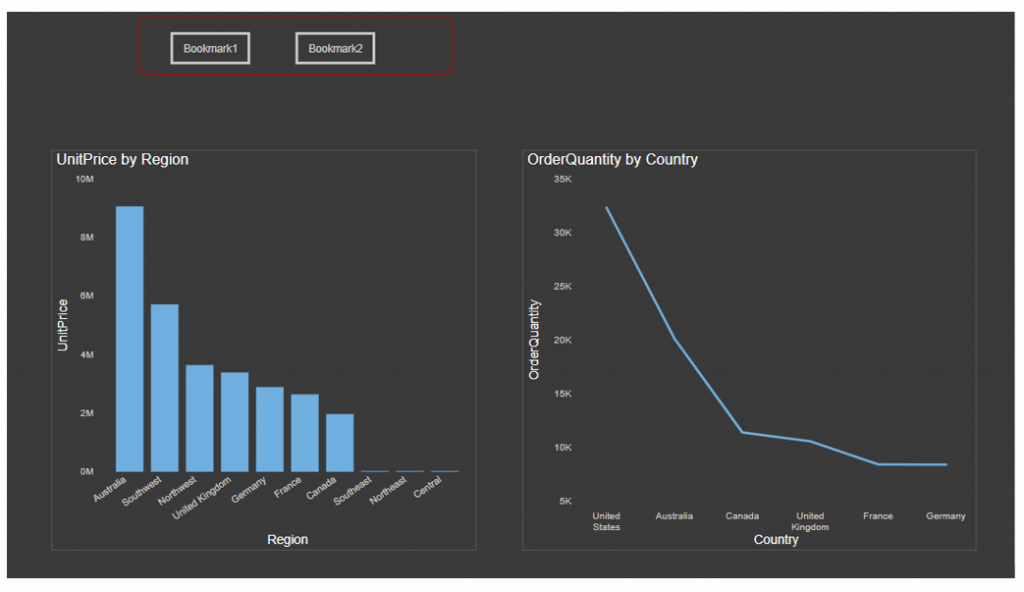
Step 3: Similarly, you can create a button for Bookmark2.


